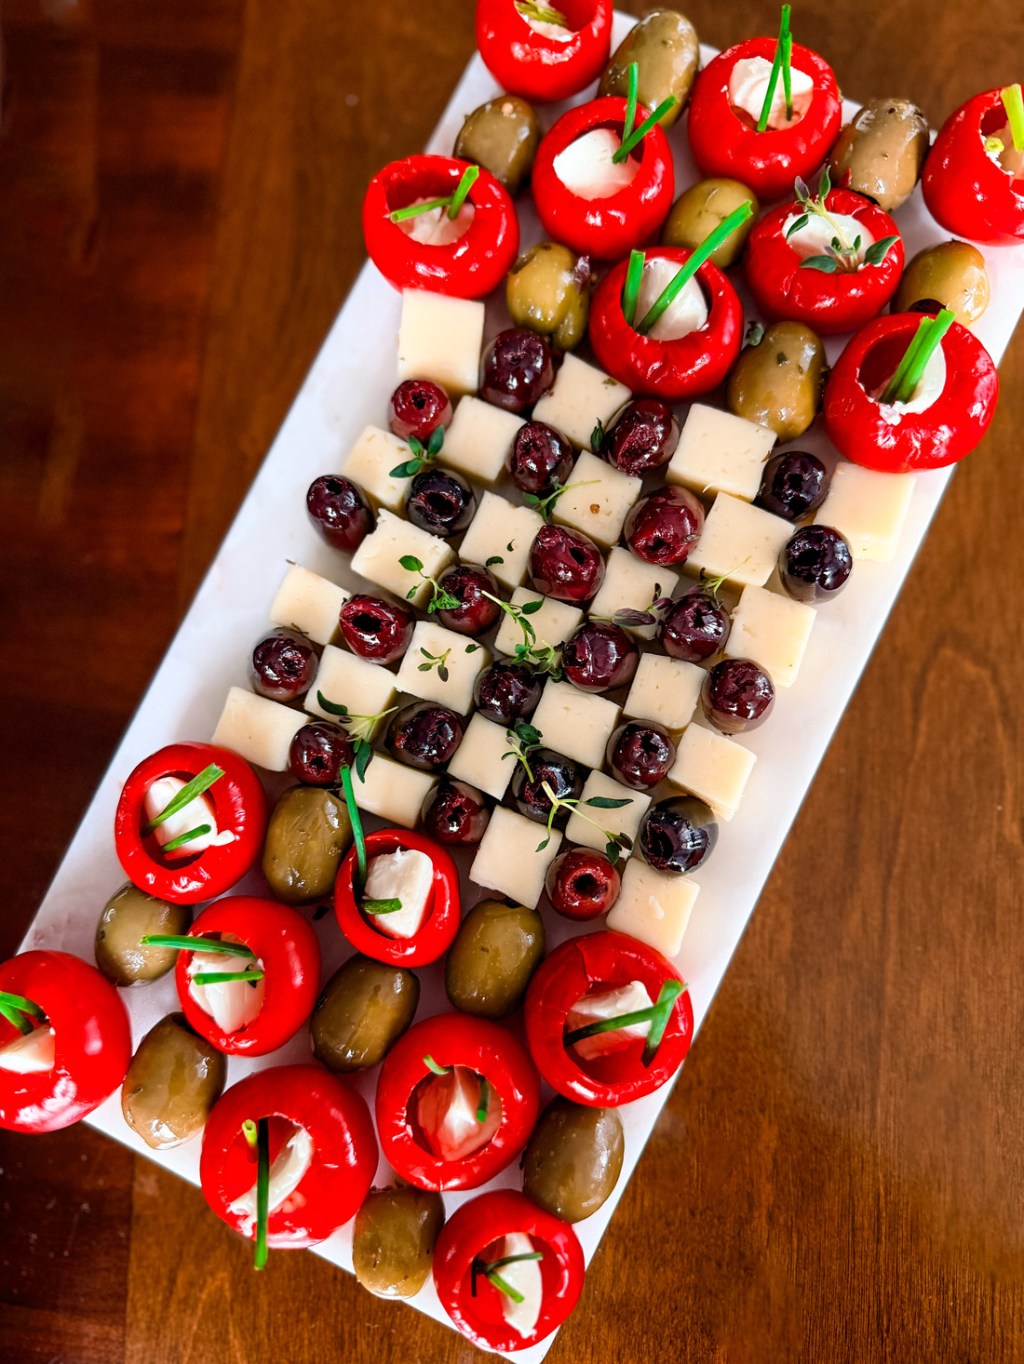
No cooking, just the pattern
Every time I host, the board is the thing people stand around. Not the hot food. Not the thing I spent an hour on in the oven. The board. And the funny part is that it is the easiest thing on the counter, because nothing on it gets cooked.
This one is all store bought. The only skill involved is how you lay it out.
Why the checkerboard works
Most appetizer boards are a pile. Good food, but your eye does not know where to land. A checkerboard does the opposite. You alternate two things in a grid, dark and light, and suddenly the whole board reads as one piece from across the room.
It also photographs well, which matters more than people admit when guests are pulling out their phones.
The rule is simple. Pick two things that are close to the same size and very different in color. Lay them in rows, offset each row by one, and keep your spacing even. That is the entire trick.
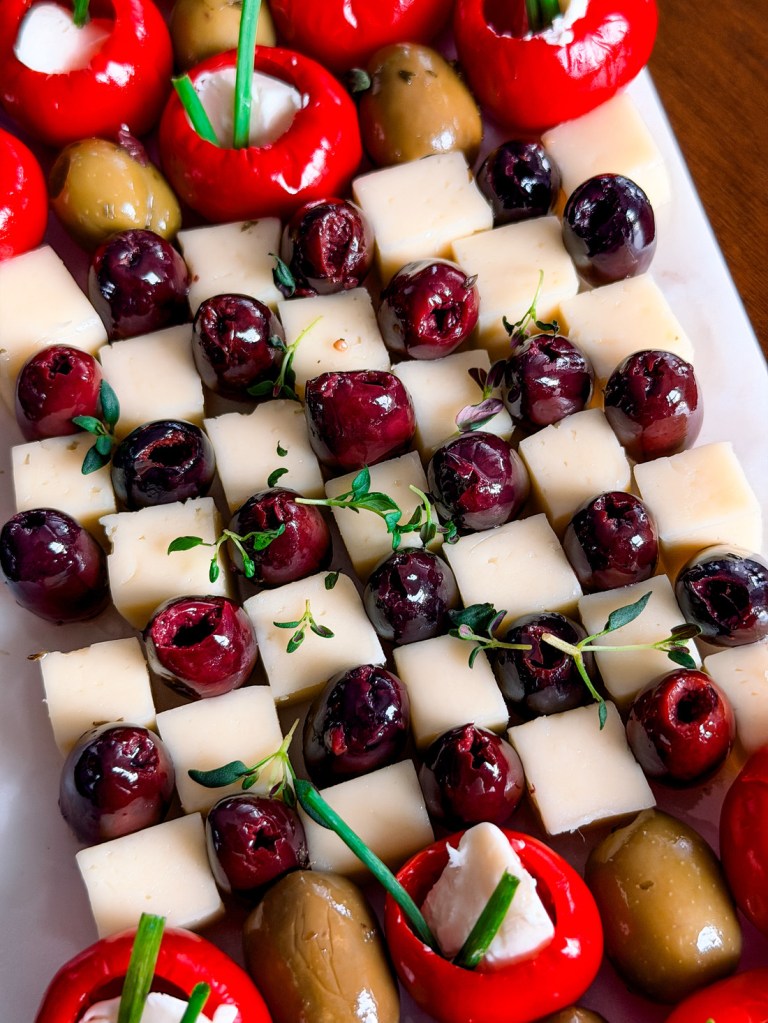
What is on the board
- Pitted dark olives, the deep red purple kind, for the dark squares
- White cheese, cubed to about the same width as the olives, for the light squares
- Mini sweet peppers stuffed with a soft white cheese, with a sliver of green onion on top
- Large green olives around the outside edge
- Fresh thyme sprigs scattered over the grid
Quantities depend on your platter and how many people you are feeding. I buy a little more than I think I need, because a board that looks full is the whole point and olives keep fine.
One thing that matters more than it sounds: use pitted olives. A pitted olive sits flat on its cut end and stays exactly where you put it. An olive with the pit in rolls, and one roll pulls the whole row out of line.
How to lay it out
- Cut the cheese first and make the cubes even. If the cubes are all different sizes the grid will never look right, no matter how careful you are after that.
- Start at one corner of the platter, not the middle. Working from a corner keeps your rows straight.
- Lay your first row across, alternating cheese and olive.
- Start the next row with the opposite item so the colors offset. That offset is what makes the pattern read as a checkerboard instead of stripes.
- Keep going until the center of the platter is covered.
- Ring the outside with the stuffed peppers and the green olives. This frames the grid and hides the spot where the rows ran out.
- Tuck the thyme in last, a few sprigs across the top. It is not just decoration, it breaks up all that straight geometry so the board looks arranged and not mechanical.
If a row drifts crooked halfway through, pull the last two pieces and reset. It takes five seconds and nobody can tell afterward.
Use a white platter
This is the part people skip. The checkerboard only reads if there is contrast, and a white rectangular platter gives you a clean edge and a bright background for the dark olives to sit against. On a wooden board the same grid goes muddy, because the wood and the olives are too close in tone.
Rectangular also beats round here. Straight sides give your rows something to line up with.
Build the rest of the spread around it
One board is a snack. Three boards is a party, and it still takes no cooking.
Next to the checkerboard I put a meat platter with tongs, so people are not reaching over each other, and a large wooden board with brie, crackers, berries, nuts and a little honey. The three together cover salty, soft, sweet and crunchy, which is all a spread really needs to do.
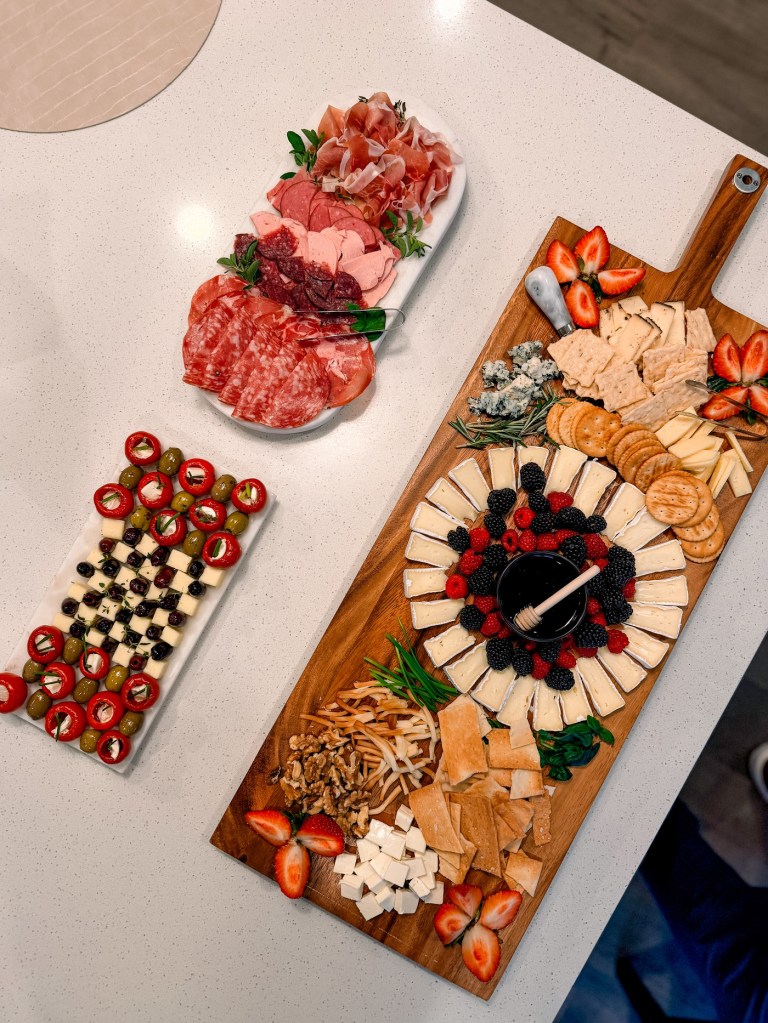
Different shapes and different heights matter here. A long white platter next to a round wooden board next to a meat tray looks considered. Three of the same thing looks like you ran out of ideas.
Make it ahead
You can build the whole checkerboard a few hours before people arrive. Cover it loosely and keep it in the fridge, then pull it out about twenty minutes before you serve so the cheese is not cold.
Add the thyme last, right before it goes on the counter, so it still looks fresh.


Leave a comment